Showing posts with label breads. Show all posts

Sunday, October 2, 2011

Olive Garden Breadsticks

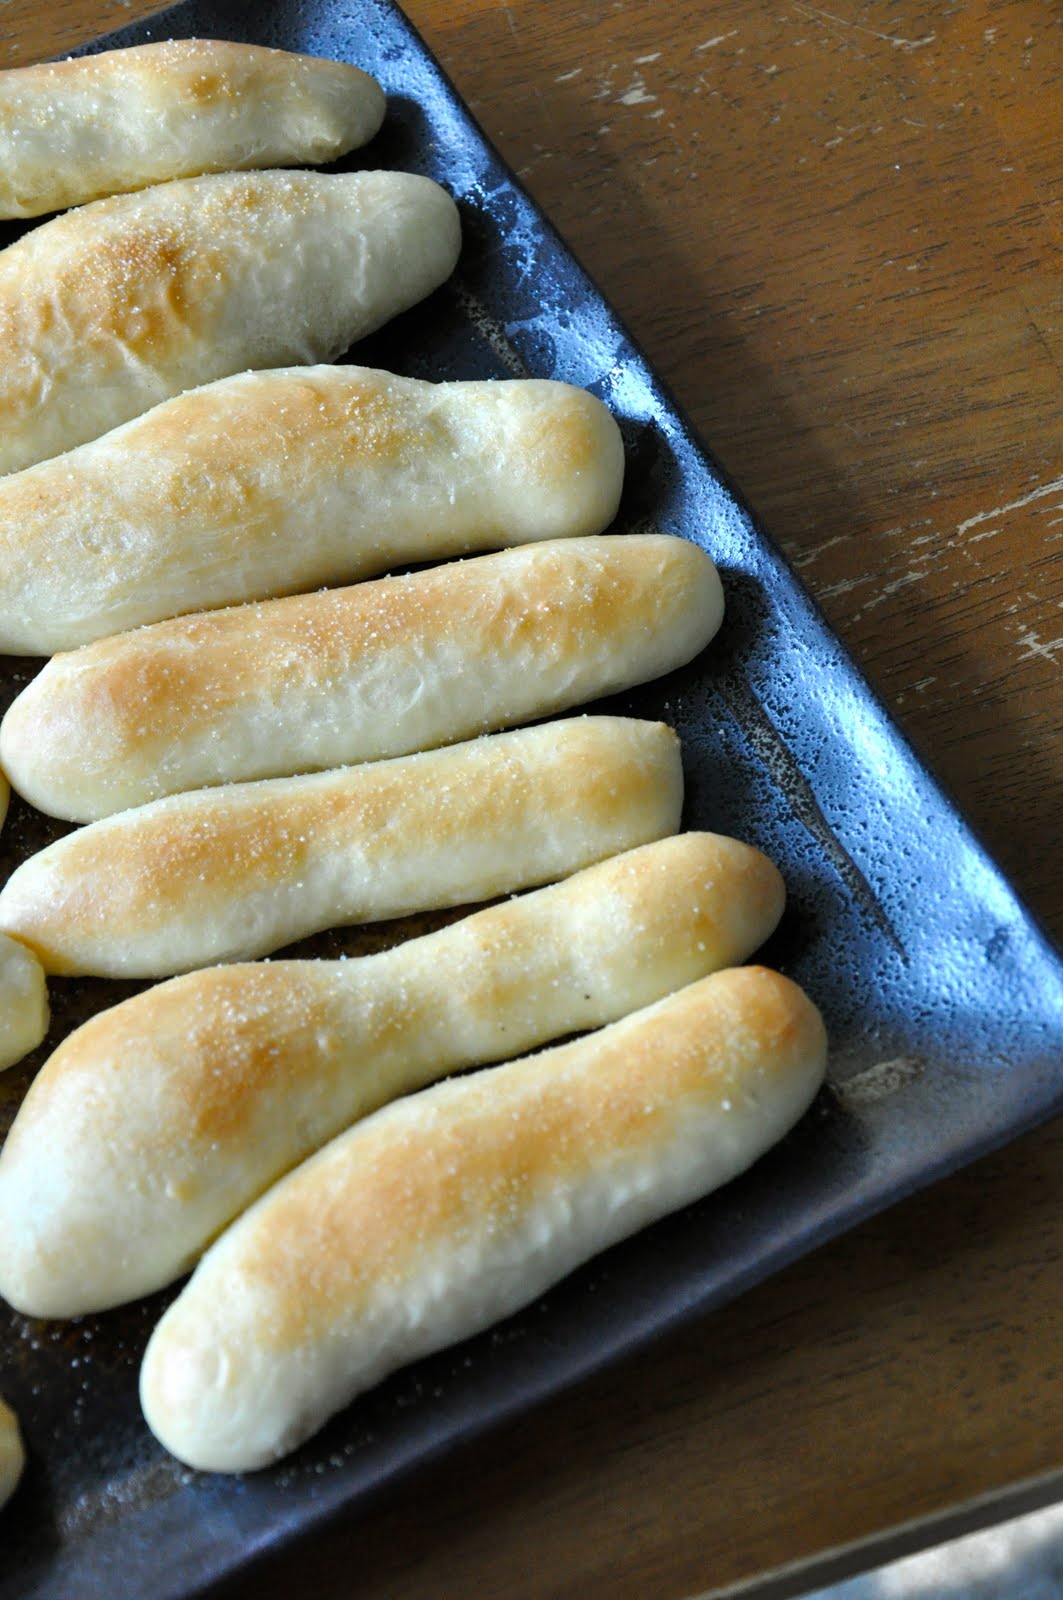
Olive Garden's breadsticks are soft, buttery, and slightly garlicky. You can find a lot of copycat recipes online, but this one is pretty good. I've made some changes after making them twice. In this picture the breadsticks are golden-brown, which is good but not like OG's version. The next time I made them I baked them for eight minutes instead of ten, and they were closer.

Jack and Ben love Olive Garden's breadsticks, but they pronounced this version "way better."

Olive Garden Breadsticks

Ingredients

2 tablespoons granulated sugar
1 1/2 teaspoons active dry yeast (about half a packet)
1 cup plus 1 tablespoon warm water (105 to 115 degrees F)
16 ounces bread flour (3 cups)
1 1/2 teaspoons salt
1/4 cup (1/2 stick) butter, softened

On top:
2 tablespoons butter, melted
1/2 teaspoon garlic salt

Directions
Dissolve the sugar and yeast in the warm water in a small bowl or measuring cup and let the mixture sit for 5 minutes or until it becomes foamy on top.

Combine the flour and salt in a large bowl. Use the paddle attachment on a stand mixer to mix the softened butter into the flour. If you don't have a stand mixer, use a mixing spoon or hand mixer to combine the butter with the flour. When the yeast mixture is foamy, pour it into the flour mixture and use a dough hook on your mixture to combine the ingredients and knead the
dough for approximately 10 minutes. If you don't have a stand mixer, combine the ingredients and then knead the dough by hand on a countertop for 10 minutes.

Place the dough in a covered container and let it sit for 1 to 1 1/2 hours, until it doubles in size. When the dough has doubled, measure out 2-ounce portions and roll the dough between your hands to form sticks that are 7 inches long. Place the dough on parchment paper-lined baking sheets, cover and set aside for 1 to 1 1/2 hours, or until the dough doubles in size once
again. You can fit them all on one sheet, but they will grow into each other. You can also put them on two sheets and rotate the pans halfway through the baking time.

Preheat the oven to 400 degrees F.

Bake the breadsticks for 8-10 minutes, or until lightly golden brown. When the breadsticks come out of the oven, immediately brush each one with melted butter and sprinkle with a little garlic salt.

Makes 12-13 breadsticks

Thursday, September 1, 2011

The. Bread.


This is another Pioneer Woman technique. She says that anytime she goes to a family get-together, everyone asks, "Are you going to bring The Bread?". It's just bread and butter, but the technique of baking then broiling browns the butter and makes the bread unbelievably flavorful and irresistible. People usually think there is something else in the bread, like garlic, but it's just bread and butter.

The. Bread.

One loaf of French bread, split
2 sticks of salted butter, softened (you won't need to use all of it unless your bread is huge)

Spread about 3/4 of a stick of butter on each piece of bread. Place side by side on a baking sheet.

Bake for 10 minutes on 350. Turn the oven off and the broiler on. Watch the bread as it browns and slightly blackens. Don't be afraid of the blackening; just a little bit won't make it taste burned. Steel your nerves and remove from oven when golden, brown, and spotty black.

Monday, November 15, 2010

No-Knead Bread

This is a dangerous recipe. It's a quick and easy way to have delicious, homemade, crusty bread every night of the week. Once you start having homemade bread with dinner, it's hard to go back to rice or potatoes! An added bonus is you'll always have dough on hand to make a quick homemade pizza. The recipe makes enough for four or more boules (round loaves) of bread, and the dough keeps in the refrigerator for two weeks.

The recipe comes from Artisan Bread in Five Minutes a Day.

No-Knead Bread

1 1/2 tablespoons yeast
1 1/2 tablespoons kosher salt
6 1/2 cups unbleached, all-purpose flour, more for dusting dough
Cornmeal

1. In a large bowl or plastic container, mix yeast and salt into 3 cups lukewarm water (about 100 degrees). Stir in flour, mixing until there are no dry patches. Dough will be quite loose. Cover, but not with an airtight lid. Let dough rise at room temperature 2 hours (or up to 5 hours).

2. Bake at this point or refrigerate, covered, for as long as two weeks. When ready to bake, sprinkle a little flour on dough and cut off a grapefruit-size piece with serrated knife. Turn dough in hands to lightly stretch surface, creating a rounded top and a lumpy bottom. Put dough on pizza peel sprinkled with cornmeal; let rest 40 minutes. Repeat with remaining dough or refrigerate it.

3. Place broiler pan on bottom of oven. Place baking stone on middle rack and turn oven to 450 degrees; heat stone at that temperature for 20 minutes.

4. Dust dough with flour. Slide onto stone. Pour one cup hot water into broiler pan and shut oven quickly to trap steam. Bake until well browned, about 30 minutes. Cool completely.

Yield: 4 loaves.

Variation: If not using stone, stretch rounded dough into oval and place in a greased, nonstick loaf pan. Let rest 40 minutes if fresh, an extra hour if refrigerated. Heat oven to 450 degrees for 5 minutes. Place pan on middle rack.

Monday, October 19, 2009

Phở and Scallion Pancakes

I used to eat phở at a Vietnamese noodle restaurant in Illinois, and sometimes I crave the unique anise/ginger/umami broth. I had some rice noodles from Super H-Mart and some ground pork, and Mark Bittman's recipe calls for pork rather than the traditional beef, so I decided to try making it myself.


I made the scallion pancakes to go with the soup because Ben is more likely to eat soup if it has some "bread" on the side - or at least some crackers or chips he can dip into the soup. Besides, despite the short ingredient list, they are surprisingly delicious! I first ate them with Korean friends, and I make them now when I need some starch to go with an Asian meal. They are also from Mark Bittman (his How to Cook Everything cookbook mentioned in the post below).


This is the time of year for soup for dinner - I love it, and fortunately, so does the whole family!

Phở (adapted from Mark Bittman's The Best Recipes in the World)

2 T. vegetable oil
1 T. minced garlic
1 large onion, chopped
1 pound ground pork
salt
10 cups beef stock or broth
1 t. ground anise or 4 star anise
1/4 t. pepper
pinch of ground cloves
1/2 t. ground cinnamon
1 3-inch piece fresh ginger, peeled and sliced, or 1 t. ground ginger
1/4 cup fish sauce (nam pla) kind of like Asian worcestershire
1 T. sugar
1 pound dried rice noodles
Toppings: cilantro, basil, Thai chiles, scallions, limes

1. Set a stockpot over medium heat and add the oil. A minute later, add garlic and chopped onion and cook, stirring occasionally, until softened, about 5 minutes.

2. When onion is cooked, add pork with a large pinch of salt. Turn heat to high; brown quickly, about 5 minutes. Add stock, anise, pepper, cloves, cinnamon, ginger, fish sauce, and sugar.

3. Bring to a boil, then lower the heat and simmer, uncovered, for about 20 minutes, until the pork is cooked through. Meanwhile, cook the rice noodles in boiling salted water until tender (follow package directions). Strain, rinse in cold water, and set aside.

4. When the pork is cooked, add the noodles to the broth and reheat them. Remove star anise, if using. Divide soup among 6-8 serving bowls. Garnish with cilantro, basil, chiles, and scallions, squeezing lime juice over all.

Scallion Pancakes (adapted from How to Cook Everything - Bittman)

This recipe makes one pancake, but you can easily double it.

1 cup all-purpose flour, plus a little more.
1/2 t. salt
1/2 cup boiling water, plus a little more if needed
1/2 cup. finely chopped scallions
1 T. vegetable oil
coarse salt

1. Mix flour and salt in a bowl. Slowly add boiling water, stirring until it forms a ball. Add a little more water if needed.

2. Knead by hand for about 1 minute. Place in a bowl covered with plastic wrap and let rest for an hour.

3. On a lightly floured surface, roll the pancake out to about 1/4 inch thick. Press scallions into pancake.

4. In a large skillet, heat oil over medium low heat. Cook pancake on one side until lightly browned, about 3-5 minutes. Turn and brown the other sides.

5. Sprinkle with coarse salt and serve warm.

Sunday, May 31, 2009

Waffles


It's Wild Animal Week at our house, so I made lion and elephant waffles for the boys.

I have a great recipe for waffles that uses a sourdough starter, but I don't always have that defrosted, fed, and ready to go. This is the recipe I use most of the time - these waffles turn out crisp, tender, and delicious.

Waffles (adapted from Better Homes and Gardens)

1 3/4 cups all-purpose flour
1 T. baking powder
1/4 teaspoon salt
1/4 teaspoon cinnamon (optional - just gives a hint of flavor)
2 egg yolks
1 3/4 cups milk
1/2 cup cooking oil
2 egg whites

1. In a medium mixing bowl stir together flour, baking powder, and salt. Make a well in the center of dry mixture; set aside.

2. In another medium mixing bowl beat egg yolks slightly. Stir in milk and oil. Add egg yolk mixture all at once to the dry mixture. Stir just until moistened (batter should be lumpy).

3. In a small mixing bowl beat egg whites till stiff peaks form. Gently fold beaten egg whites into flour and egg yolk mixture, leaving a few fluffs of egg white. Do not overmix.

4. Cook waffles according to manufacturer's directions. Keep waffles in a low oven until finished baking. Makes 12-16 4-inch waffles or 8 Belgian waffles.

Saturday, April 4, 2009

Homemade Tortillas


Instead of the insipid gummy blandness of store-bought tortillas, these were substantial and flavorful. The slightly blackened spots added an almost smoky taste. These were more than just a vehicle for getting meat, cheese, and vegetables to your mouth! Crisp and slightly chewy at the same time - delicious.

Were they easy? Well, they take a bit of planning. They could certainly be made ahead of time and rewarmed in a dry skillet. There is no yeast involved, so there is no rising time, but the dough does need to rest.
I found the recipe on a blog called the Homesick Texan (http://homesicktexan.blogspot.com/2007/03/and-end-to-my-quest-flour-tortillas.html) which is a great find as well! I'll be visiting often to try her recipes.

Homemade Flour Tortillas

Ingredients:
Two cups all-purpose flour (can make them whole wheat by substituting one cup of whole-
wheat flour for white flour)
1 1/2 teaspoons baking powder
1 teaspoon salt
2 teaspoons vegetable oil
3/4 cups warm milk

Mix together the flour, baking powder, salt and oil. Slowly add the warm milk. Stir until a loose, sticky ball is formed.Knead for two minutes on a floured surface. Dough should be firm and soft.

Place dough in a bowl and cover with a damp cloth or plastic wrap for 20 minutes.After the dough has rested, break off eight sections, roll them into balls in your hands, place on a plate (make sure they aren’t touching) and then cover balls with damp cloth or plastic wrap for 10 minutes.

After dough has rested, one at a time place a dough ball on a floured surface, pat it out into a four-inch circle, and then roll with a rolling pin from the center until it’s very thin and about eight inches in diameter. Don’t overwork the dough, or it’ll be stiff.

Keep rolled-out tortillas covered until ready to cook. Gently shake off excess flour. In a dry skillet heated on high, cook the tortilla about thirty seconds on each side. It should start to puff a bit when it’s done.Keep cooked tortillas covered wrapped in a napkin until ready to eat. Can be reheated in a dry iron skillet, over your gas-burner flame or in the oven wrapped in foil. While you probably won’t have any leftovers, you can store in the fridge tightly wrapped in foil or plastic for a day or so. Makes eight tortillas.

Monday, March 9, 2009

Bagels!


These had to be the hit of last week. They are sooo good: Jack said that they were the best bagels he's ever had. They are smaller than what you'd get at Einstein's, etc. I topped some of them this time with salt and sesame seeds, but we're thinking asiago cheese and cinnamon sugar would be good as well.

It's amazing that a change in technique can make flour, salt, yeast, and water taste so different. This recipe follows the traditional method of boiling, then baking. I'm estimating that each bagel is about 130 calories, which is much better than the typical 300 calorie bagel you can buy.

King Arthur Flour Bagels

Note: These bagels require a starter that develops overnight. You could also make the starter in the morning and make the bagels after 6-8 hours. If you use active dry yeast as I did instead of instant (which is not the same as Rapid Rise), your rise time will be longer.

Starter

1/2 cup (2 1/8 ounces) King Arthur (or other brand) Unbleached Bread Flour

1/4 cup (2 ounces) cool water

pinch of yeast

Dough

4 cups (17 ounces) King Arthur Unbleached Bread Flour

1 1/4 cups (10 ounces) cool water

1 3/4 teaspoons salt

1 1/2 teaspoons instant yeast

Water bath

water to fill a 10" - 12"-diameter pan about 1" deep

1 tablespoon brown sugar

Combine the starter ingredients in a medium-sized bowl, cover, and let rest at room temperature overnight.

Next day, combine the puffy starter with all of the dough ingredients and knead—by hand, electric mixer, or bread machine—to form a stiff but not dry dough. Since we're using a high-protein bread flour here, you might notice it takes a bit more effort and time to develop the gluten. Place the dough in a lightly greased bowl or large (at least 8-cup) measuring cup, cover, and set it aside to rise for 1 hour.

Gently deflate the dough, and let it rise for another 30 minutes. Transfer the dough to a work surface, and divide it into 12 pieces. Roll each piece into a smooth, round ball. Cover the balls with plastic wrap, and let them rest for 30 minutes. They'll puff up very slightly.

While the dough is resting, prepare the water bath by heating the water and sugar to a very gentle boil in a wide-diameter (about 10") pan. A 10" electric frying pan works well here.

Preheat your oven to 425°F. Use your index finger to poke a hole through the center of each ball, then twirl the dough on your finger to stretch the hole till it's about 2 inches in diameter (the entire bagel will be about 3 ½" across). Place each bagel on a lightly greased or parchment-lined baking sheet, and repeat with the remaining pieces of dough.

Transfer the bagels, four at a time if possible, to the simmering water. Increase the heat under the pan to bring the water back up to a gently simmering boil, if necessary. Cook the bagels for 2 minutes, flip them over, and cook 1 minute more. Using a skimmer or strainer, or the end of a wooden spoon, remove the bagels from the water and place them back on the baking sheet. Repeat with the remaining bagels.

Bake the bagels for about 22-25 minutes, or until they're as deep brown as you like. To top with seeds, remove them from the oven after about 15 minutes, spray with water or brush with beaten egg, and sprinkle with seeds or kosher salt. Return to the oven to finish baking. Remove the bagels from the oven, and cool completely on a rack. Yield: 1 dozen chewy bagels.

Friday, February 13, 2009

Garden Muffins

I found this savory muffin recipe on the Cooking Light boards, though it originally came from a cookbook called The City Gardener. They are delicious and wonderful with soup or salad. I wouldn't substitute whole wheat flour because the cornmeal is already a whole grain and the muffins might become too heavy. I made a few changes to the original recipe based on recommendations and our preferences.

Garden Muffins

1 cup flour
1 cup yellow cornmeal
2 Tbsp sugar
2 tsp baking powder
1 tsp salt
1 egg
3/4 cup milk
1/4 cup oil
2 Tbsp butter, melted
1/2 cup sweet corn kernels (original recipe called for chopped tomato)
1/2 cup grated zucchini
1/2 cup grated carrot
1/4 cup chopped green onion
grated Parmesan cheese (optional)

Preheat oven to 400F. In a medium bowl, combine the flour, cornmeal, sugar, baking powder, and salt and mix well. In a small bowl, beat together the egg, milk, oil, and butter. Stir in the dry ingredients. Add the corn, zucchini, carrot, and green onions, blending thoroughly. Spoon the batter into greased muffin tins, filling about three-quarters full. Top with a little grated Parmesan, if desired. Bake 20-25 minutes, until golden brown. Serve warm. Makes 1 dozen muffins.

Per Muffin (assuming 12 muffins): 161 Calories; 8g Fat (42.6% calories from fat); 3g Protein; 20g Carbohydrate; 2g Dietary Fiber; 23mg Cholesterol; 205mg Sodium. Exchanges: 1 Grain(Starch); 0 Lean Meat; 0 Vegetable; 0 Non-Fat Milk; 1 1/2 Fat; 0 Other Carbohydrates.

Thursday, May 1, 2008

Peanut Butter Banana Chocolate Chip Muffins

Now, here's a muffin recipe for everybody. They use up those old bananas that have turned too black to eat, and they include the sacred marriage of peanut butter and chocolate. I use half whole-wheat flour for some added nutrition.

Peanut Butter Banana Chocolate Chip Muffins

1 1/4 cups all-purpose flour
1 1/4 cups whole wheat flour (can use all white flour)
1/2 cup sugar
1/2 cup packed brown sugar
1 tablespoon baking powder
3/4 teaspoon salt
1/4 teaspoon cinnamon
2 ripe large bananas -- mashed
1 cup skim milk
3/4 cup smooth peanut butter
1 tablespoon canola oil
1 teaspoon vanilla
1 large egg
1 cup chocolate chips

In a large bowl stir together flour, sugars, baking powder, salt, and cinnamon. In another bowl combine mashed bananas, milk, peanut butter, oil, vanilla and egg. Add to flour mixture, stirring until just combined. Stir in chocolate chips. Pour batter into two greased loaf pans or muffin tins. Bake at 350 F for 50 to 55 minutes (check at 40 minutes!) for bread or at 20 minutes for muffins or until a toothpick inserted near the center comes out clean. Makes 2 loaves or 18-24 muffins.

Wednesday, April 30, 2008

Sweet Potato and Zucchini Muffins

I found this recipe on the Cooking Light forums, which I read quite often. I was looking for some healthy muffins to make for playgroup when Jack was little. I still make these for the boys, and they really like them. I like their nutritional profile, especially after I made some changes to the recipe. I wouldn't say they are the most delicious muffins I've ever made, but they're for the children anyway!

My changes to the recipe are in parentheses. I highly recommend reducing the sugar. Adding dried or frozen berries is a nice change. I usually make these as mini muffins.

Sweet Potato and Zucchini Muffins my changes are in parentheses

2 cups all purpose flour (1 c. white and 1 c. wheat)
2 tsp ground cinnamon
1 tsp baking soda
1/4 tsp salt
2 cups sugar (1 cup sugar)
3/4 cup veg. oil (half oil and half vanilla yogurt)
3 large eggs
1 tsp vanilla extract
1 1/2 cups grated zucchini (2 cups)
1 1/2 cups grated, peeled sweet potato (2 cups)
1 cup chopped walnuts, toasted (omitted)

Preheat oven to 350. Spray mini muffin tins with cooking spray. Sift first 4 ingredients into bowl (flour through salt). Beat sugar, oil, yogurt, eggs, and vanilla to blend in large bowl. Mix in zucchini and sweet potato. Add dry ingredients and walnuts and stir well. Transfer batter to prepared pan. Bake until tester comes out clean, about 12-14 minutes. Cool for 10 minutes in pans and remove. Finish cooling on baking racks. You can also bake this in a greased and floured loaf pan for 1 hour and 20 minutes.